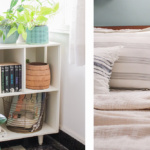


7 easy decor DIYs because we're in the mood for a monsoon facelift
Budget-friendly hacks to give your home a fresh new look
Dopamine is probably a word that would trigger premature greying in desi parents. All they hear is ‘dope.’ Find me one dad who hasn’t denounced the neighbours’ son for secretly ‘doing drugs’ late at night and ‘ruining the neighbourhood’ – he was probably just smoking a cigarette after his parents fell asleep. But like other strange trends – using lube as makeup primer and pigeon handbags – chasing dopamine boosts has become the new Temple Run.
The feel-good hormone is now a player in interior design. Dopamine decorating translates into mindfully crafting your space with colours and objects that — beyond being functional — bring you joy and satisfaction. “Home dwellers are now honing their style, and putting their own personalities forward with more collected items and mixing,” design expert Grace Baena tells Better Homes & Gardens, explaining dopamine decor. “This eclecticism often results in a vibrant colour palette and unique look.”

Now, we know what you’re thinking. Who has the time to oversee painters, renovations or go to Chor Bazaar and hunt for the almirah that will perfectly complement the newly upholstered sofa already showing its first patches of monsoon’s most-hated trend — mould? No one does, but you can still give your home a little palate cleanse.
From our arsenal of saved posts, we dug through DIY decor ideas from our favourite design pundits to refresh your home without too much effort.
Grab some glue and get ready to start your next project.
DIY decor and home hacks you can do today
Swap scented candles for this aromatic home brew
Consider this hack to beat the overbearing dampness that greets us in the monsoons? Decor influencer Chantel Mila puts this fragrant concoction to boil, and soon the whole house smells like cake. Bonus, it’s easy to do and cost-effective too. You can play around with the ingredients depending on what smells you’re drawn to, but here’s her recipe:
Material required
2 cups of water
Some sliced lemon
2 sprigs of rosemary
1 tbsp vanilla extract
1 tbsp cloves
Method
- Boil two cups of water on the stove.
- Add one sliced lemon.
- Add two sprigs of rosemary.
- Add one tablespoon of vanilla extract.
- And finally, one tbsp of cloves.
- Allow the fragrance to fill your home.
Put your seashell collection to good use
Your mom may have told you off for hoarding seashells from every vacation. Now, you can feel vindicated with this DIY. String up those shells into a handmade wind chime that you can show off to your followers on Instagram. Sujata Dey has given us many such easy DIY decor ideas that can brighten up any window or balcony.
Material required
Glue gun
Thin and thick rope
Seashells
Beads
Small branch of any tree
(Disclaimer: While a glue gun is preferable, you can grab some Fevikwik from your local shopkeeper too. Just don’t get any on your fingers.)
Method
- Place the shells you wish to use on a table.
- Stick the shells to a thin rope with glue. Make sure to leave space between shells.
- You can even add tiny beads between two shells if you want.
- Tie the upper end of your seashell rope to a branch.
- Take a thicker rope and tie a knot at the top of your branch. Make sure there is enough space for it to hang on the wall.
Create nostalgia with old saris
Here’s an opportunity to clear up real estate in your wardrobe, and challenge your inner craftsman, thanks to @letstogetherbecreative on Youtube.
Materials required
Cardboard box
Old pieces of cloth
Glue gun or Fevikwik
Barbeque skewers
Scissors
Method
- Cut triangles out of a cardboard box. Make sure that they are all of the same size.
- Place an old cloth over one of the triangles to get an ideal measurement. Grab a pair of scissors to make a slightly bigger triangular cut.
- Apply some hot glue to the corners of the cardboard. Stick the cloth to it.
- Flip the piece towards its front side.
- Glue the skewers to the corners of the artwork.
- Repeat the process with different pieces of a printed or embroidered dress or sari.
- Hang or stick it to the wall in any order you like.
Succulents to the rescue
The cycle of bringing beautiful plants home but not being able to maintain them is exhausting. And if you are anything like me, you too can address yourself as a certified plant murderer, I mean I can kill a cactus. (I am not proud of it.)
For folks like us, having succulent-filled mini terrariums might be the best place to start. And well, home decor content creator Pinky shows us a simple DIY way to get it done.
Material required
Glass container
Sand
Rocks
Soil
Water
Succulents
Method
- Take any glass container. Make sure that it’s spacious enough.
- Layer it with sand, rocks and soil, one on top of the other.
- Once done, sprinkle some water over the last layer (i.e. soil)
- Place 2-3 succulents in the middle.
- Finally, spray some water again and decorate it with colourful rocks.
See what an ice cream box can do
Tired of the same old earthen pots? Are ceramics out of your budget right now? Well, try out this easy DIY decor technique of turning an old ice cream tub into a quirky planter. Sunita Meena shows us how she does it, though, you can cover it up with pretty much any colours and materials you like. Make sure you poke some holes in the bottom for drainage.
Material required
Empty ice cream box
Acrylic paint
Baking soda
Empty paper rolls
3D Outliner
Method
- Mix some paint and baking soda to create texture.
- Take an ice cream tub and cover it with the mixture.
- Cut your empty paper rolls in half while painting them.
- Grab a 3D outliner to work on the design of your piece.
- Outline the box with some zig-zag lines and dots.
- Flip the box upside down to make drainage holes.
- Take some glue and stick the paper rolls below the box vertically.
- Add some soil to plant your little sapling.
Revamp your lampshade on a budget
Scrolling through Pinterest every now and then does one of two things for you: it either stimulates your creative juices or leaves you wanting things you don’t need. And if you ever stumble upon the endless chain of aesthetic home decor items, consider it the death of your bank account.
An easy way to keep yourself from buying unnecessary things is to revamp what you already own. And Kadambari’s Mystic Decor on Instagram tells us how we can start by refurbishing an age-old lamp to make the favourite corner of your house fancier. And it’s so simple.
Materials required
Thick rope
Thread
Method
- Remove the shade of your lamp.
- Start wrapping it vertically with a rope in a string-like format.
- Make sure to leave equal distances between each rope.
- Once you have covered the surface area of the lampshade, take a thread and tie three strings together with a thread.
- And, you are done.
Make your own candle, using an orange peel
Who would have thought an orange could do so much? Well, here’s a DIY by Rohina Anand Khira that’s a perfect fit for Mumbai’s gloomy weather, and the smells that come with it. Light this and in an instant, the aroma will transport you to citrusy fields far away. And momentary escapism is not the only reason you should give this a try. Experts also claim that the fragrance of citrus often helps decrease stress levels.
Material required
Orange
Knife
Carrier oil (Khira uses sesame oil)
Method
- Cut the top off an orange, making sure to keep the pit intact.
- Scoop out the flesh from the bottom part of the fruit.
- Put the pit inside the fruit’s bottom.
- Add some carrier oil to it.
- And there you go – light it!